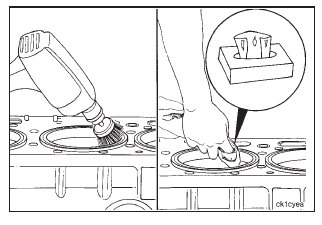
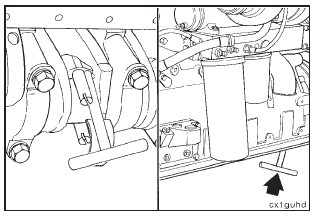
Plug the overhead oil rifle, push tube cavities, and coolant passages in the block; and use a rotary wire brush to remove the carbon ring from the top of the cylinder liner.
Use a scraper that has an aluminum blade if a rotary wire brush is not available.
Use lint-free paper to remove all the broken wire bristles and loose carbon from the cylinders.
Rotate the crankshaft to position two of the connecting rods at bottom dead center (BDC).
Loosen the connecting rod capscrews.
NOTE: Do not remove the capscrews.
Hit the connecting rod capscrews with a rubber hammer to loosen the rod caps from the dowels.
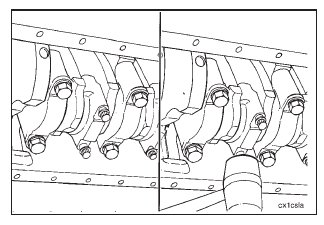
Remove the connecting rod capscrews and the rod caps.
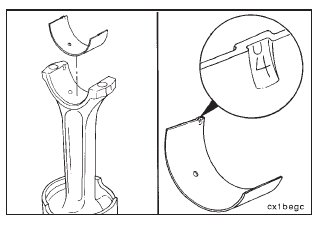
Remove the bearing shell from the rod cap, and mark the cylinder number and the letter ‘‘L’’ in the flat surface of the bearing tang.
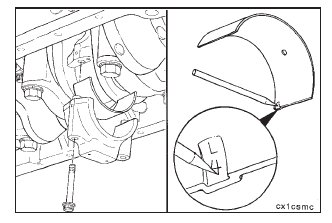
Install two connecting rod guide pins, Part No. 3375601.
Use a ‘‘T-handle’’ piston pusher to push the rod away from the crankshaft.
NOTE: Push the rod away from the crankshaft, over the
crankshaft rod journal, and push the rod until the piston rings are outside of the top of the cylinder liner.
Remove the piston and rod assembly.
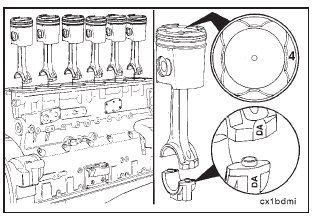
NOTE: The piston and connecting rod assemblies must be
installed in the same cylinder number from which they were removed to make sure correct fit of worn mating surfaces if parts are to be used again. Use a tag to mark the cylinder number from which each piston and rod assembly was removed.
NOTE: The pistons must have the cylinder numbers
stamped on the piston top toward the camshaft side of the engine.
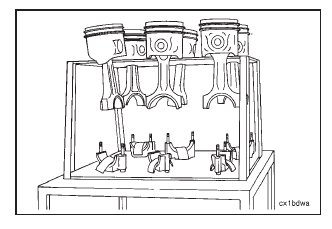
Put the rod and piston assemblies in a stand to protect them from damage.
Caution: The rod cap alpha-numeric characters must match the alpha-numeric characters on the connecting rod and must be installed with the characters aligned to prevent damage to the connecting rods and the crankshaft.

Remove the upper rod bearing.
Mark the cylinder number and the letter ‘‘U’’ in the flat surface of the bearing tang.
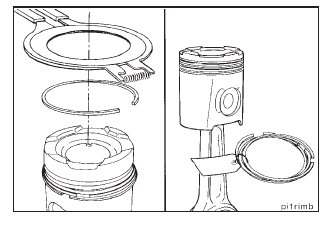
Use the piston ring expander, Part No. 3823871, to remove the piston rings.
Put a tag on the rings, and record the cylinder number of the piston on the tag for future reference (if required).
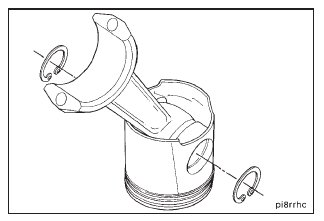
Use internal snap ring pliers to remove the snap rings from both sides of the piston.
Use a blunt tool to push the piston pin from the piston and rod assembly.