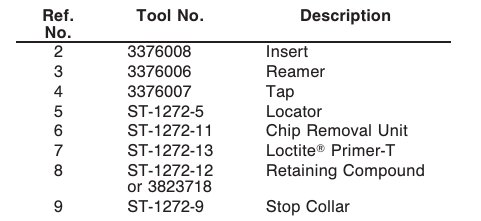
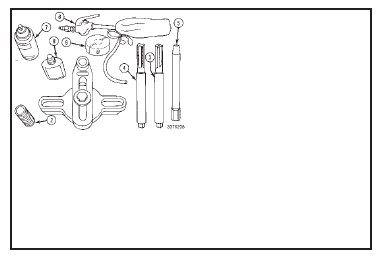
Components included in the capscrew thread repair kit, Part No. 3376208, for the N14 block are as follows:
Remove any burrs from the top deck surface of the cylinder block. A flat mill file is very effective for this process.
Burr removal is necessary so that you can get an accurate fixture location.

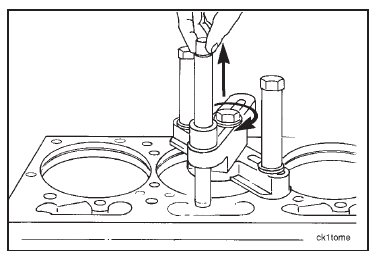
Align the fixture with the failed capscrew hole. Install the reamer base plate and the guide bar to the cylinder block.
Position the guide bar over the capscrew hole to be repaired. Using a tapered locator, center the guide bar and
the bushing over the capscrew hole.
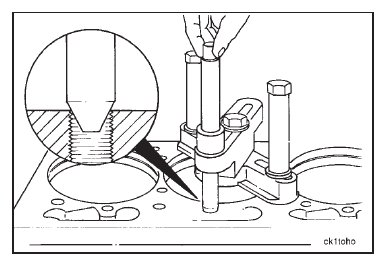
Tighten the guide bar and bushing assembly. Remove the tapered locator.
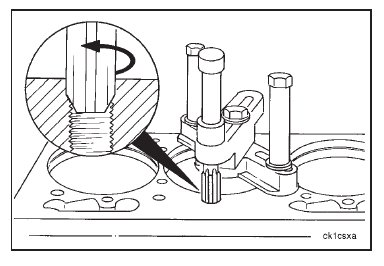
Ream the failed capscrew hole to the full depth of the hole.
Use a chip removing unit to remove reamer chips from the capscrew hole.

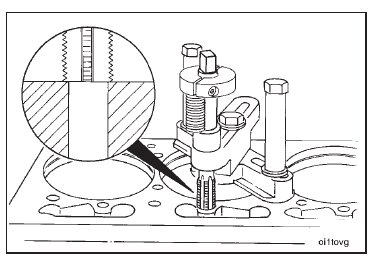
Set the tap stop collar to the correct height, using the insert to be installed. Tap the capscrew hole.
NOTE: It can be necessary to stop, remove the tap, and remove chips from the hole several times before achieving
full depth.
Use a chip removing unit to clean the capscrew hole of shavings and debris. Remove the tap.
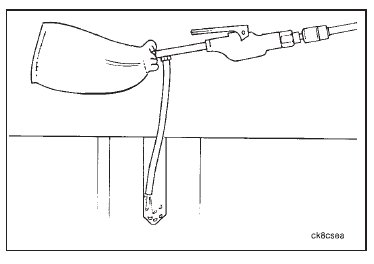
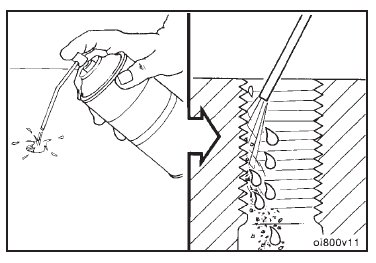
Clean and flush the newly cut threads with safety solvent, Part No. 3823717. Use a chip removing unit to clean the
capscrew hole of shavings and debris, and allow to dry.
Lightly spray the threads with Loctiteா Primer-T, Part No. ST-1272-13, and allow to dry.
Prepare the thread insert for installation. Put the jam nut on a cylinder head capscrew. Install the repair insert on
the capscrew until it contacts the jam nut.

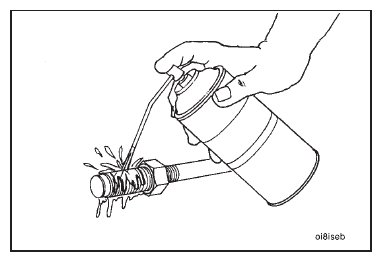
Clean and flush the outside diameter of the repair insert with safety solvent and allow to dry. Lightly spray with
Loctiteா Primer-T, Part No. ST-1272-13, and allow to dry.
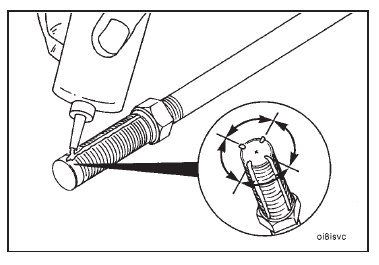
Apply four beads of sealant, Part No. 3823718, to the outside diameter of the closed end thread insert. The
beads of sealant must be approximately 1/32-inch wide and 90 degrees apart. Each bead must be the full length
of the external threaded portion of the insert.
Install and tighten the repair insert.
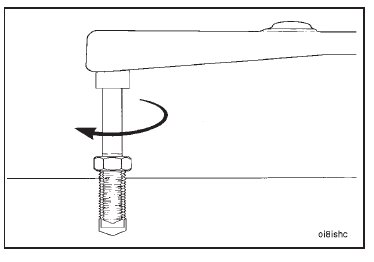
Loosen the jam nut. Remove the cylinder head capscrew and jam nut arrangement.

Correct installation will provide 0.00 mm to 0.50 mm [0.000-inch to 0.020-inch] protrusion above the cylinder
block surface.
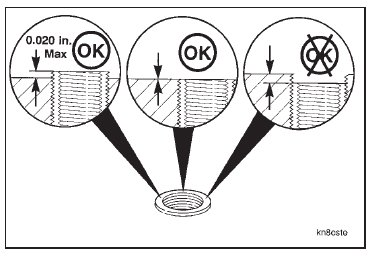
File the top of the thread repair insert even with the cylinder head mounting surface.
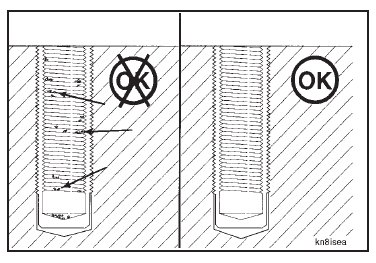
Make sure the inside portion of the repair insert is clean.
Remove any file shavings or debris.
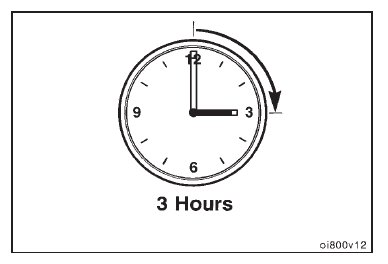
Before tightening the cylinder head capscrews, allow the sealant to cure for 3 hours.