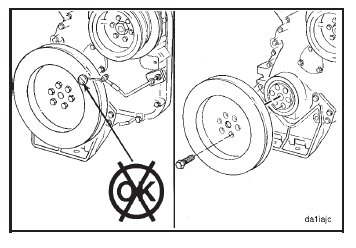
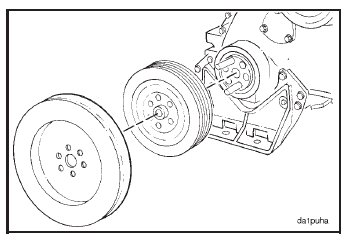
Install two guide pins into the end of the crankshaft. Install the pulley and the vibration damper.
NOTE: Make sure the mounting surfaces of the crankshaft nose, the vibration damper, and the pulley are clean, dry,
and free of burrs.
Caution: Do not use an anti-seize compound, penetrating oil, or oil containing a friction modifier to lubricate
the capscrews. This will result in incorrect capscrew torque and possible capscrew failure.
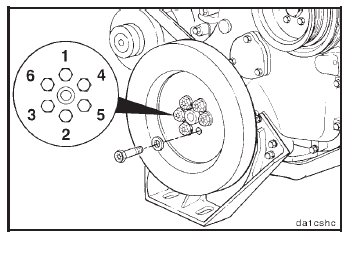
Lubricate the threads of the capscrews and the washer with a film of SAE 15W-40 oil.

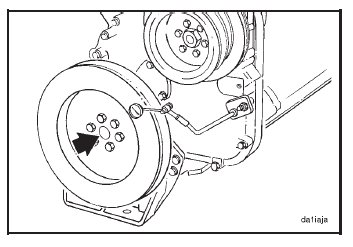
Install four of the six mounting capscrews. Remove the two guide studs, and install the remaining two capscrews.
Install the washers and the capscrews. Keep the crankshaft from rotating, and tighten the capscrews to the
following torque values, in the order shown:

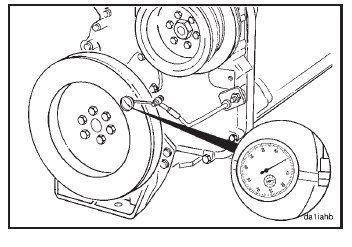
Install the dial indicator on the gear cover as indicated to measure damper eccentricity.

Rotate the crankshaft, and record the indicator movement.
Replace the vibration damper if the eccentricity exceeds 0.10 mm [0.004-inch] per 25.4 mm [1.0 inch] of
the damper diameter.
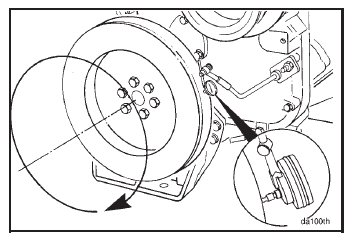
Install the dial indicator as indicated to measure wobble.
Push the crankshaft to the front or to the rear.
Rotate the crankshaft 360 degrees, maintaining the position of the crankshaft (either toward the front or the rear)
in relation to the block.
Record the total indicator motion.
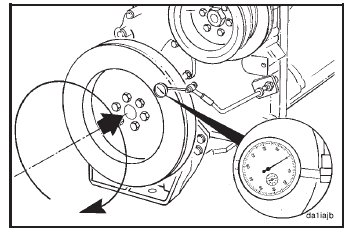
Replace the damper if wobble exceeds 0.18 mm [0.007- inch] per 25.4 mm [1.0 inch] of radius. This is the same
as 0.09 mm [0.0035-inch] per 25.4 mm [1.0 inch] of damper diameter.