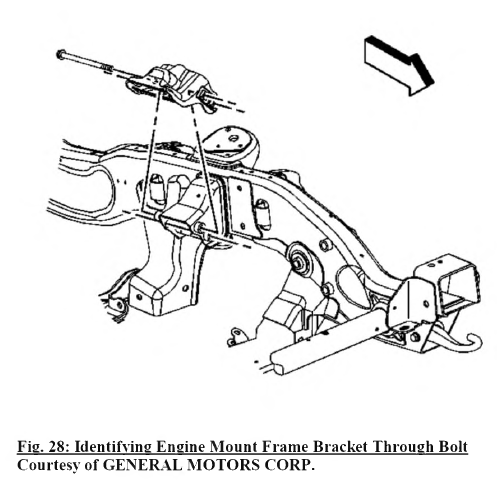
1. Position the engine mount frame bracket on the frame. Do not install the bolts.
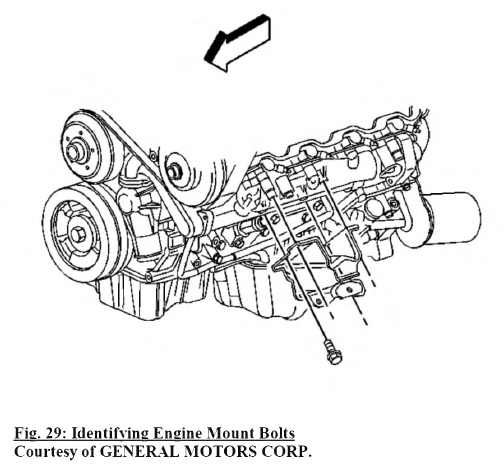
2. Install the engine mount.
3. Perform the following procedure prior to installing the engine mount bracket bolts.
1. Remove all traces o f the original adhesive patch.
2. Clean the threads o f the bolt with denatured alcohol or equivalent and allow to dry.
3. Apply threadlocker GM P/N 12345382 (Canadian P/N 10953489) or equivalent to the bolts.
NOTE: Refer to Fastener Notice .
4. Install the 2 through-bolts.
Tighten: Tighten the through-bolts to 75 N.m (55 lb ft).
5. Install the bolts holding the engine mount to the engine.
Tighten: Tighten the engine mount bolts to 58 N.m (43 lb ft).
6 . Lower the engine.
7. If 4WD vehicle remove the chain from the front o f the engine.
8. If 4WD vehicle, install the generator mounting bracket and the power steering mount bracket bolt.
Tighten: Tighten the mounting bracket bolts to 50 N.m (37 lb ft).
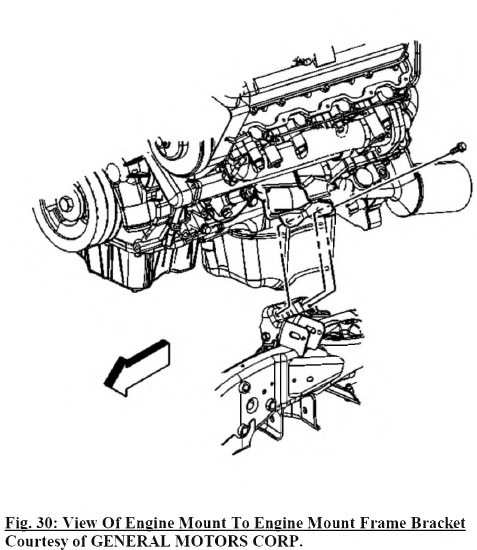
9. Install the 3 bolts holding the engine mount to the engine mount frame bracket.
Tighten: Tighten the engine mount to engine mount frame bracket bolts to 65 N.m (48 lb ft).
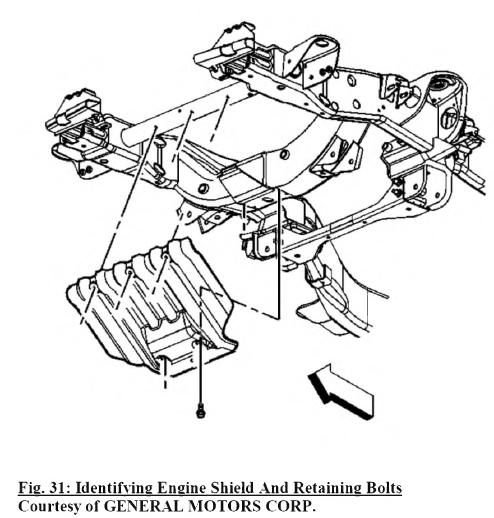
10.Install the engine protection shield and bolts.
Tighten: Tighten the engine protection shield bolts to 20 N.m (15 lb ft).
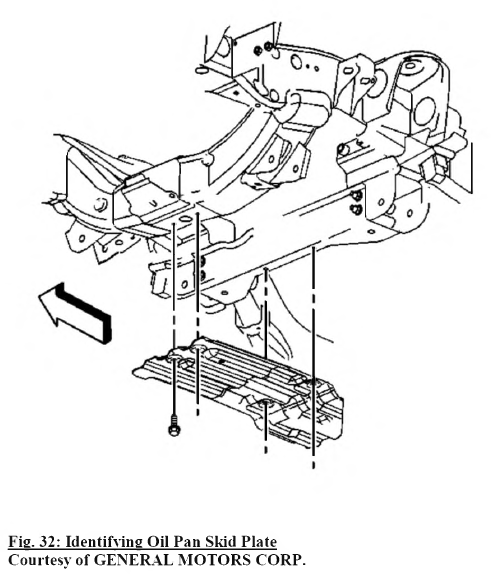
11. Install the oil pan skid plate.
Tighten: Tighten the bolts to 20 N.m (15 lb ft).
12. Remove the wheelhouse inner panel. Refer to Front Wheelhouse Liner Replacement – Left Side (Chevrolet) or Front Wheelhouse Liner Replacement – Left Side (G M C ).
13. Lower the vehicle.
