Install
Rear Gear Train
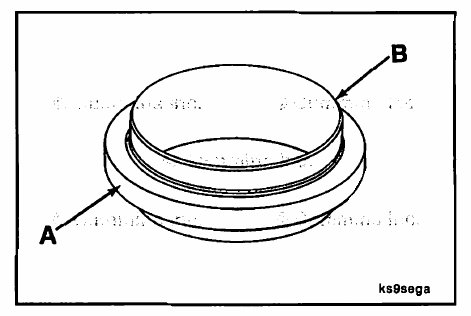
To aid in installation, apply a mild soap to the outside diameter of the seal case (A).
NOTE: On engines equipped with a lip style rear crankshaft seal, a seal pilot (B) is provided with the new
seal. The seal must be left on the seal pilot while installing the seal onto the nose of the crankshaft. This will ensure
the lips of the seal do not get damaged during installation.
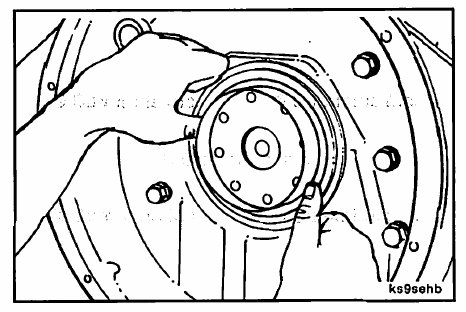
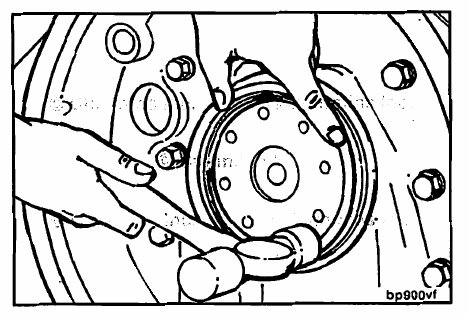
Place the new rear crankshaft seal, with the seal pilot, over the crankshaft nose and slide it by hand toward the
flywheel housing.
NOTE: Make sure the seal is positioned squarely with the crankshaft.
Remove the seal pilot.
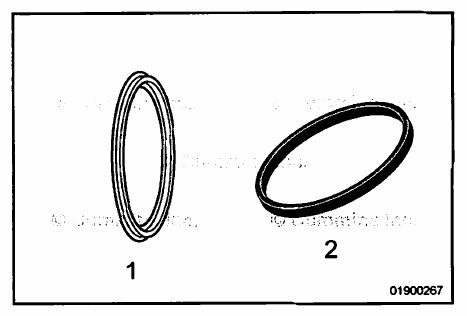
Each new lip style crankshaft seal comes with a disposable seal driver.
• The seal driver (1) for front gear train engines, which is typically a metal ring, will install the crankshaft seal
to the proper depth in the rear seal carrier bore.
• The seal driver (2) for rear gear train engines, which is typically a plastic ring, will install the crankshaft seal to
the proper depth in the flywheel housing bore.
NOTE: For rear gear train engines, the rear crankshaft seals for the wet flywheel housing applications do not
come with a disposable seal driver. Service tool, Part Number 3824078, must be used to install the rear crankshaft seal for the wet flywheel housing. This is the same service tool used for installing the rear crankshaft seal and wear sleeve assembly. Refer to Procedure 001-067 in Section 1.
NOTE: For front gear train engines, this service tool can be used in place of the disposable seal driver that comes
with the crankshaft seal.
NOTE: It may be necessary to lightly tap the rear crankshaft seal with a plastic hammer without the
disposable seal driver to help get the seal started.
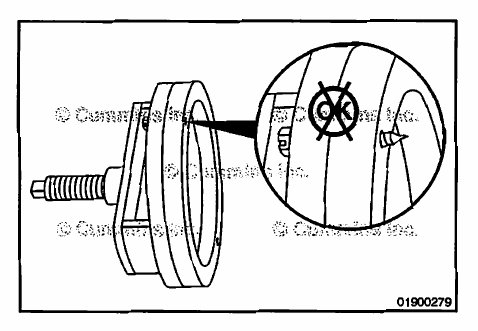
Use the appropriate disposable seal driver that comes with each new rear crankshaft seal to install to the correct
depth in the housing.
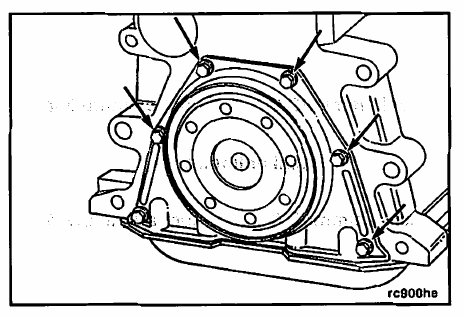
Use a plastic hammer to drive the seal into the housing until the alignment tool stops against the housing.
Hit the tool at 12, 3, 6 and 9 o’clock positions to drive the seal evenly and to prevent bending the seal carrier.

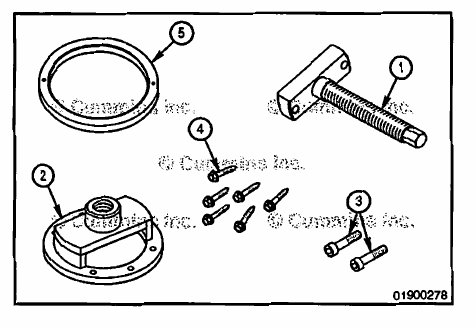
With the correct side of the disposable driver facing outwards for the type of seal that will be installed, center
the disposable driver on the crankshaft seal replacer.
Attach the disposable driver to the crankshaft seal replacer, use two sheet metal screws (number 10 by 19
mm [.75 in] long).
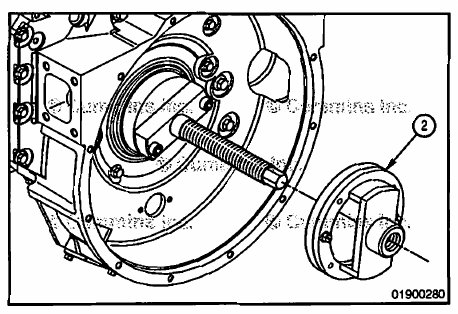
With the rear crankshaft seal installed onto the crankshaft flange as described earlier in this procedure, mount the
replacer screw assembly (1) onto the rear of the crankshaft.
Install the two M12 x 1.25 x 60-mm socket head capscrews (3).
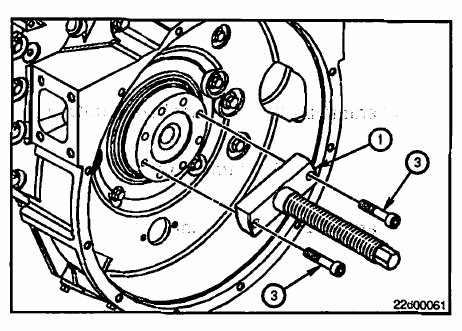
Lubricate the replacer screw with anti-seize compound or a suitable grease.
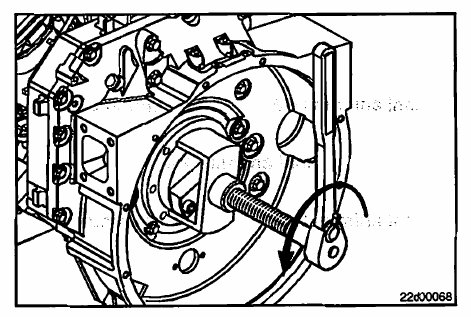
Hold the replacer screw and install the crankshaft seal replacer (2) onto the replacer screw assembly. Advance
the crankshaft seal replacer toward the seal by rotating it clockwise until the attached disposable driver is positioned against the rear crankshaft seal.
While holding the crankshaft seal replacer, rotate the replacer screw counterclockwise until the disposable
driver attached to the crankshaft seal replacer makes contact with the flywheel housing.
Remove the service tools.
Front Gear Train
The rear crankshaft seal is installed when the rear crankshaft seal carrier is installed.