Tools are available to provide a means of correcting engine rear main bearing upper seal leaks without the necessity of removing the crankshaft. The procedure for seal leak correction is listed below.
1. Drain oil and remove oil pan and rear main bearing cap.
2. Insert Packing Tool J33154-2 against one end of seal in cylinder block and drive the old seal gently into the groove until it is packed tight. This varies from 1/4″ to 3/4″, depending on the amount of pack required. (Figure 2-22).
3. Repeat this on the other end of the seal in the cylinder block.
4. Measure the amount the seal was driven up on one ide; add 1/16″, then cut this length from the old seal removed from the main bearing cap with a single edge razor blade. Measure the amount the seal was driven up on the other side. Add 1/16″ and cut another length from old seal. Use main bearing cap as a holding fixture when cutting seal as shown in Figure 2-23.
5. Place a drop of 1052621 sealer or equivalent on each end of seal and cap as indicated.
(Equivalents are Loctite 414 or Fel-Pro 361.)

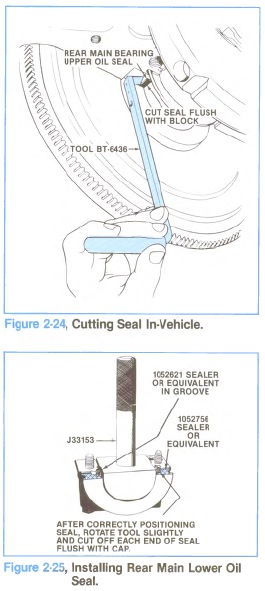
6. Work these two pieces of seal into the cylinder block (one piece on each side) with two small screwdrivers. Using Packing Tool, pack these short pieces up into the block. Use Seal Trimming Tool BT-6436 or sharp blade to trim seal flush with block as shown in Figure 2-24.
Place a piece of shim stock between seal and crankshaft to protect bearing surface before trimming.
7. Form a new rope seal in the rear main bearing cap.
8. Lubricate the cap bolts with engine oil.
9. Assemble the cap to the block and torque to specifications.