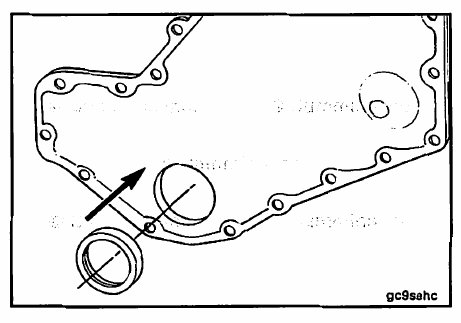
Apply a 1.5 to 2.0 mm (0.06 to 0.08 in] wide bead of sealant, Part Number 3164070, to the block side of the
front gear cover in the path illustrated.
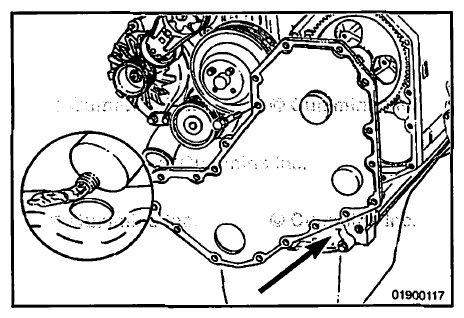
On engines equipped with an oil pressure sensor/switch located in the front gear cover, there are two critical sealant paths that must be followed:
1. In this area, the sealant must be applied toward the inner edge of the front gear cover to avoid an unused mounting hole in the cylinder block.
2. Sealant must be applied around both the mounting hole location and the oil supply hole in the front gear cover.
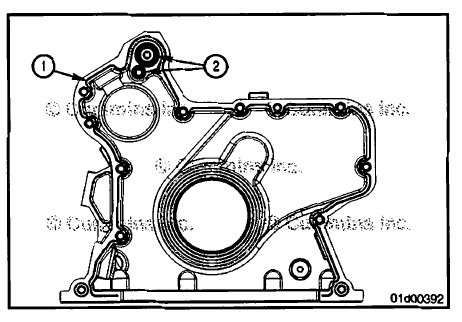
To make sure the unused mounting hole (3) in the cylinder block does not affect the sealing joint, fill the mounting
hole with sealant, Part Number 3164070.
NOTE: Before installing the front gear cover, verify there is no cup plug installed in the oil gallery port (4). This port
supplies oil pressure to the front gear cover-mounted oil pressure switch/sensor.
NOTE: Install the front cover within 10 minutes of applying the sealant, or the sealant will not seal correctly. Once
installed, allow the sealant to dry for 30 minutes before operating the engine.

Use the dowel rings to locate the front gear cover and install the front gear cover onto the cylinder block.
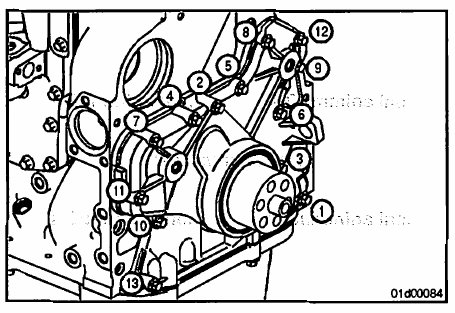
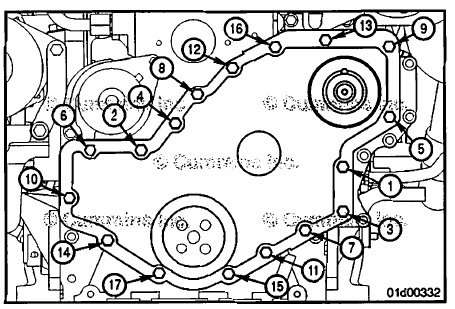
Install the front gear cover mounting capscrews. Tighten in the order indicated by the illustration.
Torque Value: 24 N•m ( 212 in-lb ]
Front Gear Train
Install a new front crankshaft seal into the front gear cover prior to installing the front gear cover.
Leave the plastic pilot installation tool in the front crankshaft seal.
Position the seal on the seal installation tool, Part Number 3824498, with the dust lip facing outward.
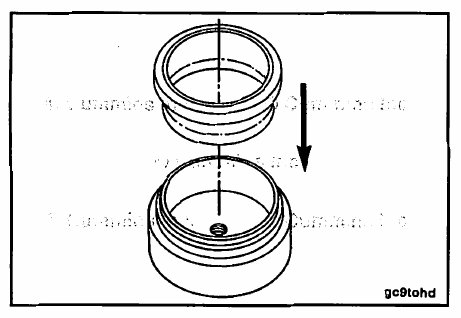
Apply a bead of sealant, Part number 3375068, to the outside circumference of the seal.
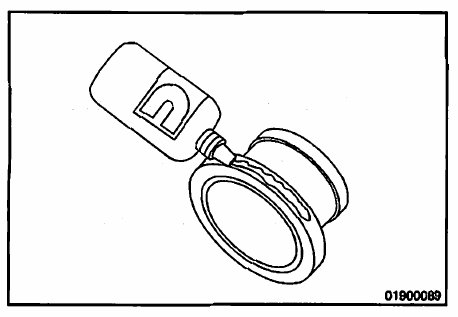
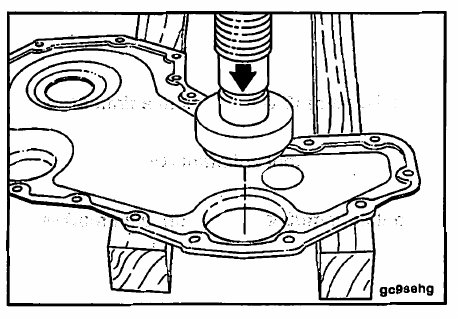
NOTE: Properly support the front gear cover lubricating oil seal flange to prevent damage to the lubricating oil seal
and the front gear cover.
Press the front crankshaft seal into the front gear cover from the backside of the front gear cover toward the front side.
Press the lubricating oil seal until the crankshaft seal installation tool, Part Number 3824498, bottoms against
the front cover.
NOTE: Each front crankshaft seal kit comes with an installation tool. This tool can be used in place of front crankshaft seal installation tool, Part Number 3824498, if it is not available. Use a mallet and tap around the installation tool to drive the front crankshaft seal into the front gear cover until the installation tool bottoms against the front gear cover.
Apply a thin bead of sealant, Part Number 3164070, to the sealing surface of the front cover.
NOTE: Do not remove the plastic seal pilot tool from the front crankshaft seal at this time. Use the plastic seal pilot
tool to guide the seal on the crankshaft.
NOTE: Install the front cover within 10 minutes of applying the sealant, or the sealant will not seal correctly. Once
installed, allow the sealant to dry for 30 minutes before operating the engine.
Install the front gear cover on the engine. Use the plastic seal pilot tool to guide the front crankshaft seal onto the
crankshaft.
Install and tighten the front gear cover capscrews in the order indicated.
Torque Value: 24 N•m [ 212 in-lb ]
Remove the plastic pilot tool from the crankshaft.
If previously equipped or if the engine operates in a dusty environment, install a dust shield.
A pilot tool is not necessary for the dust shield. Slide the dust shield over the nose of the crankshaft.